
If you are a Jira user and need to synchronize some data with another team working in ServiceNow, you'll find that sharing information manually is difficult, time-consuming, and error-prone. But you can overcome that challenge by adopting the right Jira and ServiceNow integration to enable automatic and regular data exchange.
Introduction
Teams working on different platforms often have information useful to each other. But, sharing it manually is difficult, time-consuming, and error-prone. That’s why you need an integration solution that can enable automatic and regular data exchange.
Automated integrations minimize the probability of errors while making sure that both sides have full control over what they need to share.
If you are a Jira user and need to synchronize data with another team working in ServiceNow, here’s your complete guide to a Jira ServiceNow integration.
Why Integrate Jira and ServiceNow?
Teams use data for different reasons, but there is huge scope for crossover. For example, your engineers want to stay updated about the bugs your customer service team discovers — and the customer service team wants to know when bugs are fixed.
With the right integration solution, managers can copy the data each team needs between both platforms and make sure it stays updated. These updates can happen in real time or over a specific duration.
In addition, integrating ServiceNow with Jira provides a decentralized system, which improves transparency and breaks down silos between teams.
Who Needs a Jira ServiceNow Integration?
Here are some scenarios where integrating data from Jira issues with ServiceNow incidents can benefit organizations.
- The marketing team can share customer feedback with the design team.
- Managed services providers (MSPs) can connect and share information with clients and other MSPs.
- Customer support staff can share updates with the sales and marketing teams or even with developers using Jira.
What Are Some Considerations When Choosing an Integration Solution?
To secure the information moving between teams, it is important to select an integration solution that guarantees flexibility, security, and scalability.
You also need to consider the supported entities, as well as customizability. In general, look for any third-party integration solution that supports cross-company integrations.
Exalate is a bi-directional integration solution that uses a single-tenant architecture to support information sharing between non-compatible work management systems.
This integration tool enables users to map integrations using templates or scripts. You can also guarantee security using access control and tokens.
A cybersecurity MSP, Nviso, uses Exalate for deep ticket integration in order to optimize workflows.
So, let’s explore how you can set up your own Jira ServiceNow integration using Exalate.
How to Connect Your Jira and ServiceNow in 6 Steps
First, you’ll need to install Exalate on both Jira and ServiceNow before proceeding.
Step 1 - Install Exalate on Jira
The installation process is slightly different depending on what type of Jira you have: Jira Server or Jira Cloud. I’ll be working with Jira Cloud for this example.

Go to the Atlassian Marketplace and search for “Exalate Jira Issue Sync & more”.
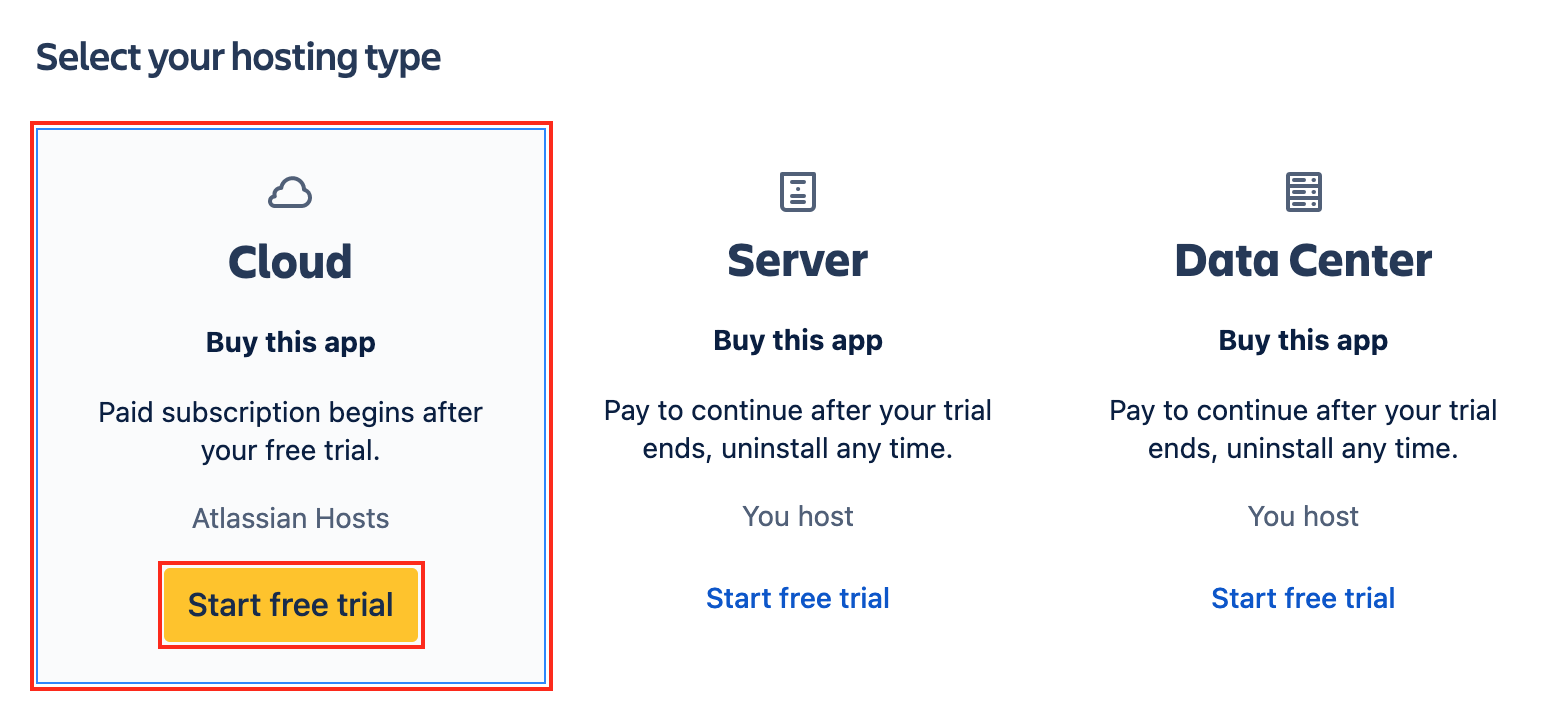
Select the matching product and click “Try it free”. Select “Cloud” as your hosting type and click “Start free trial.”

Choose a site to install the app and click “Start free trial”. Then, confirm the free trial to complete the installation process.
You can also install Exalate on Docker or from the App Manager. Check out the documentation for detailed instructions.
Step 2 - Install Exalate on ServiceNow
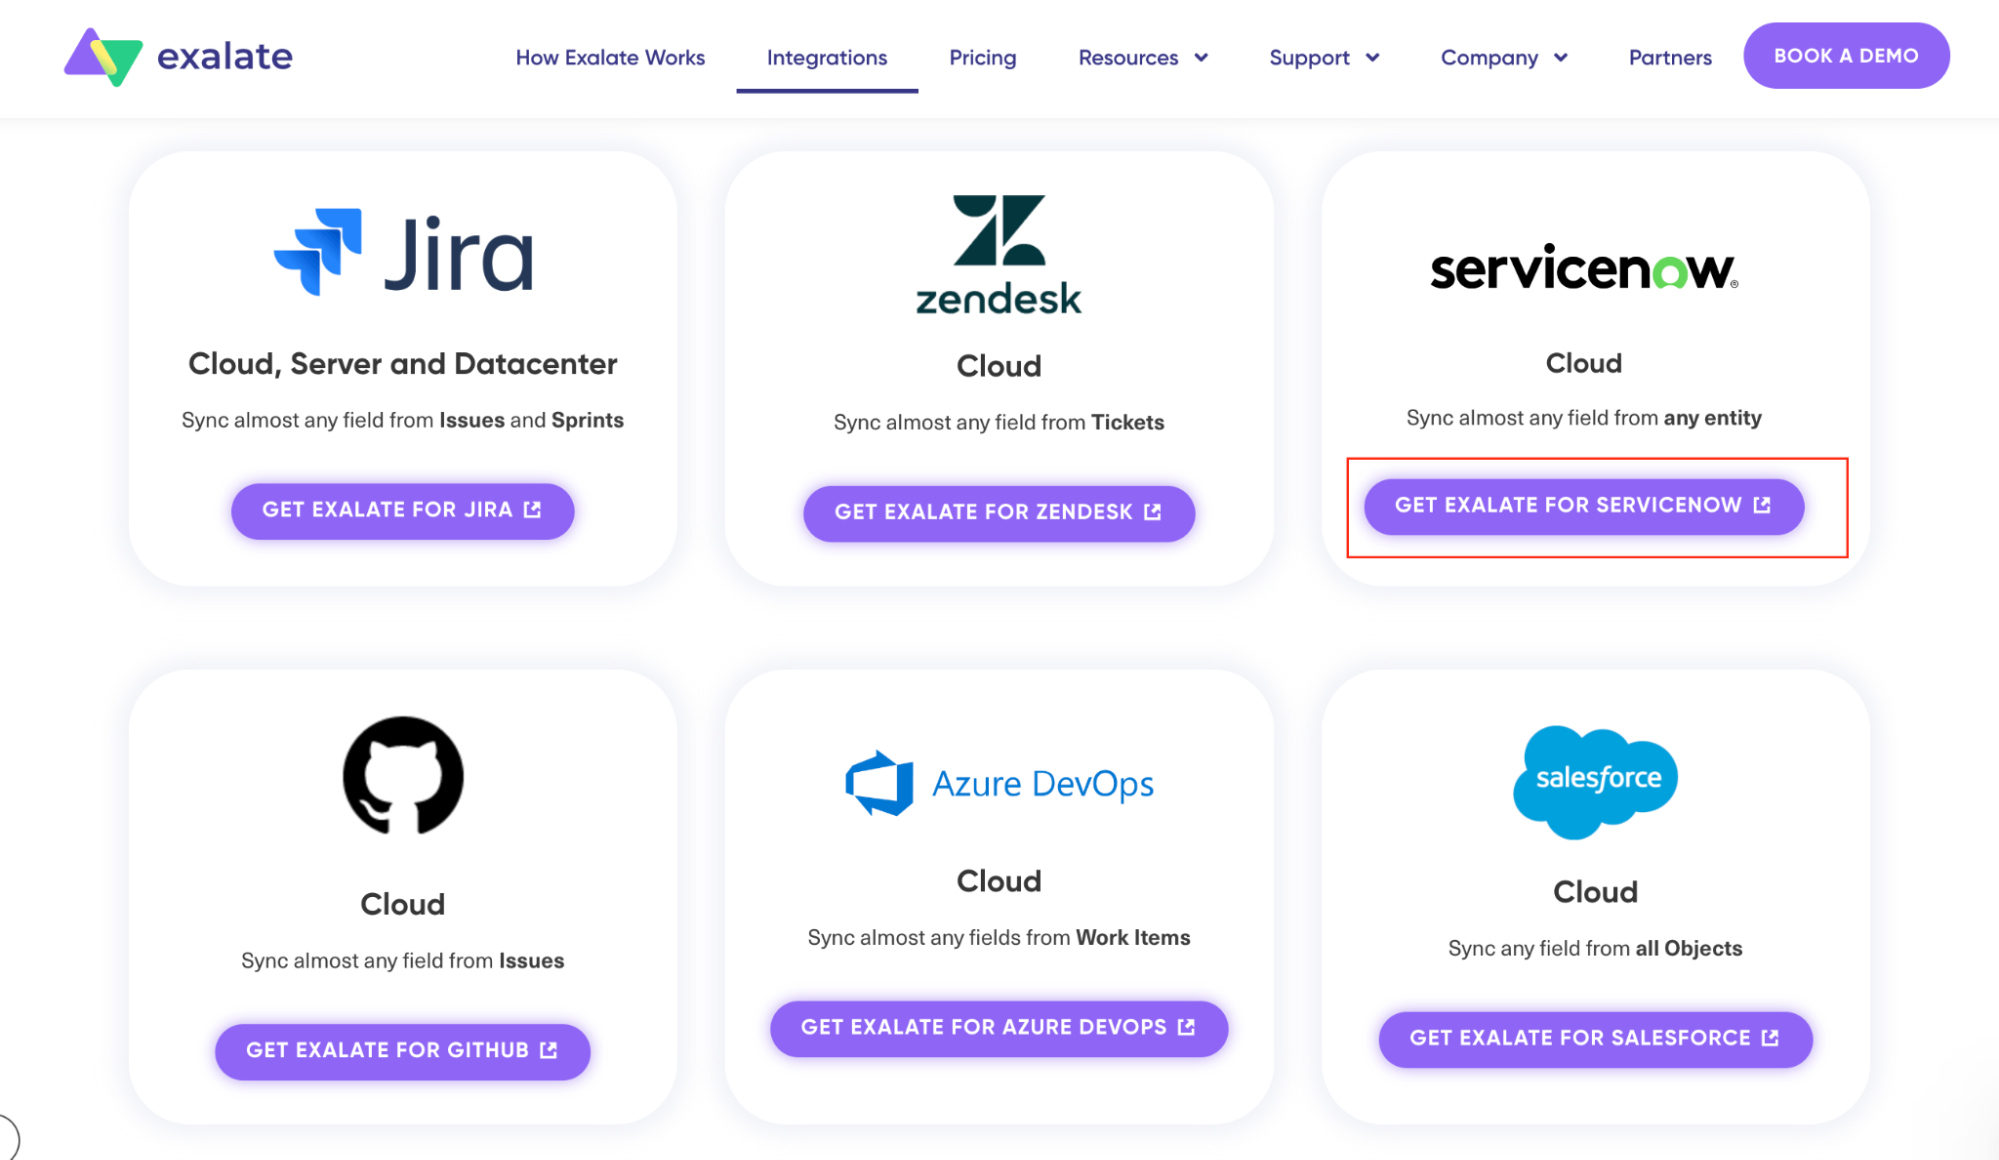
To install Exalate on ServiceNow, visit the official Exalate integrations page and select ServiceNow.
Then, you need to deploy the Exalate Bridge app. First, you have to request an evaluation instance from the Exalate team.
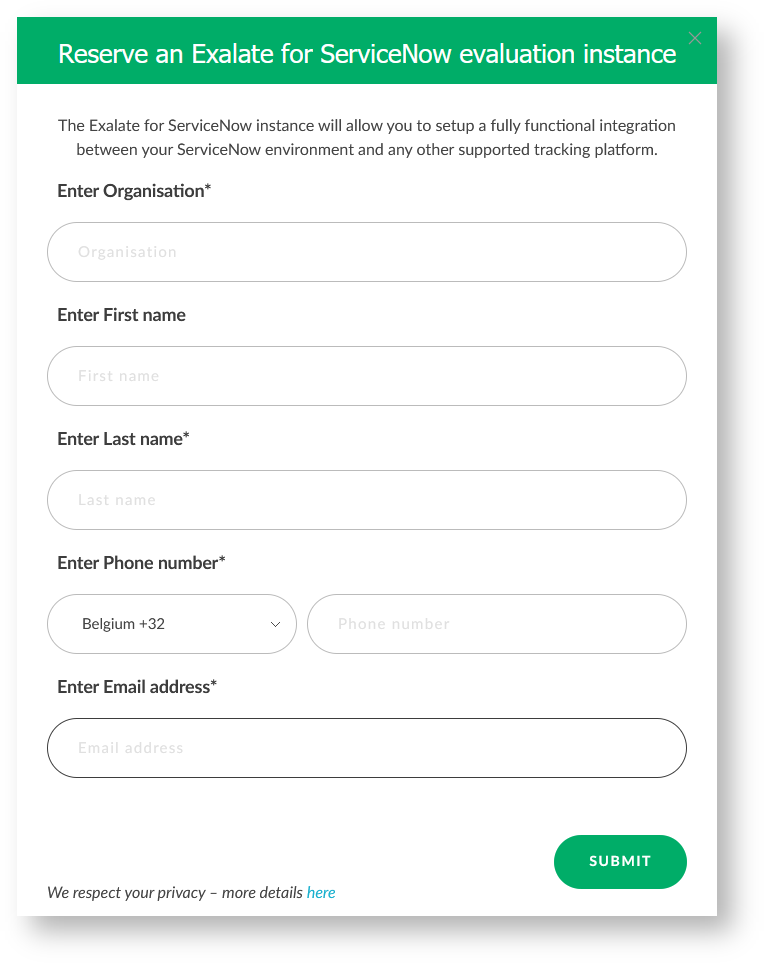
Fill out the form, and you’ll get an email letting you know how to access your node as well as your evaluation license.
You need to create a proxy user in your own ServiceNow account. Read here to learn how. You’ll also need to get an evaluation license to activate Exalate.
Next, deploy the Bridge app on ServiceNow, following these instructions.
After setting up the Exalate Bridge app, you can now start configuring your ServiceNow instance.
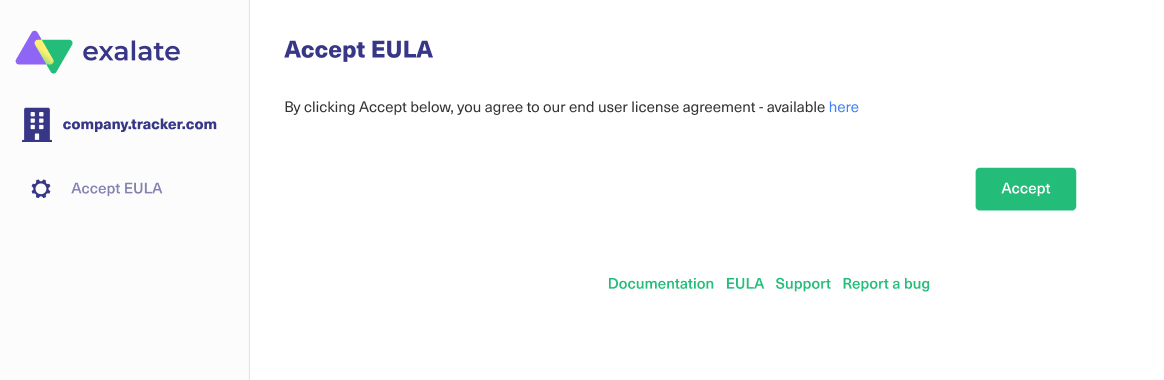
First, set up a proxy user on ServiceNow. Then, accept the EULA. After that, connect your Exalate instance using the ServiceNow instance URL, the details of the proxy users, and the evaluation license from your email.
Once this is complete, you can now access the Exalate console on ServiceNow as an admin. Follow this guide to complete the process faster.
Step 3 - Connect Your Jira and ServiceNow Instances
With Exalate installed, start connecting your instances for either the Jira or ServiceNow side — it doesn’t make any difference.
I’ll start from the Jira side.
Go to the Exalate console, click “Connections” on the left sidebar, then click “Initiate Connection”.

Enter the destination URL to check if it exists. Then, choose the type of connection you want to set up.
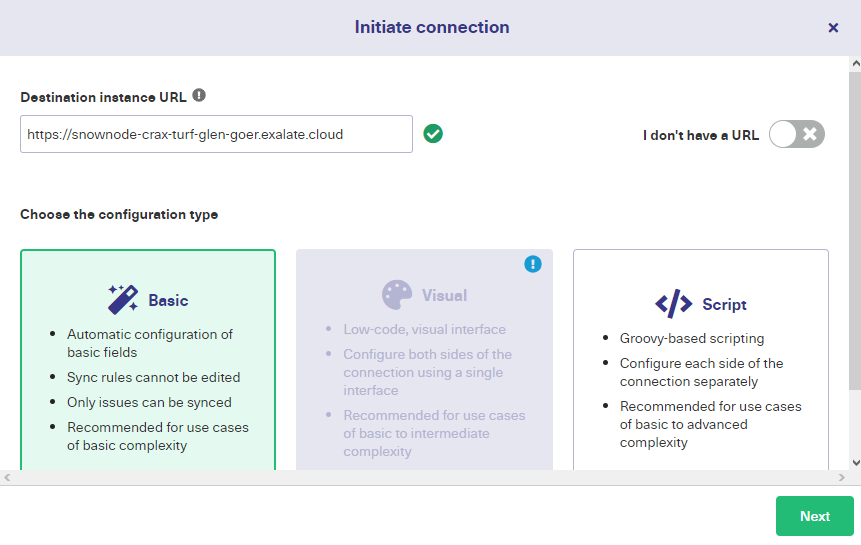
Exalate provides a no-code Basic Mode connection for syncing descriptions, summaries, attachments, and other entities. You can also use the code-based Script Mode connection for advanced custom syncs.
Let’s start with the Basic Mode.
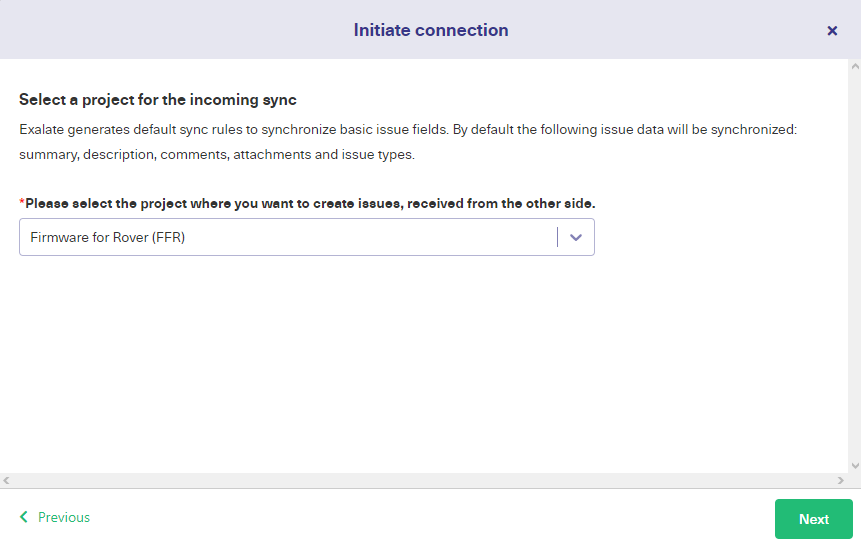
Select the Basic Mode option and click “Next”. Then, choose the project you want to sync from the dropdown menu before clicking next.
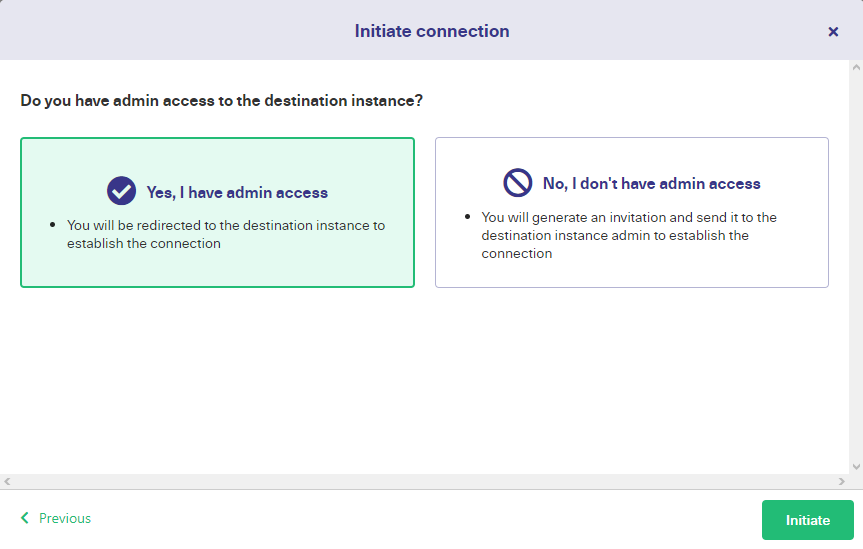
Confirm that you have admin access before clicking “Initiate”.
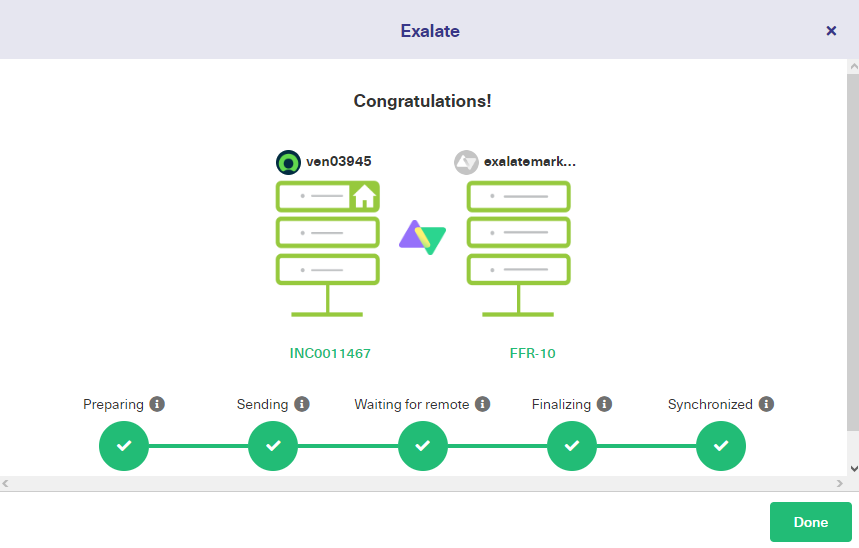
You’ll be redirected to the ServiceNow side, where you have to validate the connection. Enter the incident number and click “Exalate”.
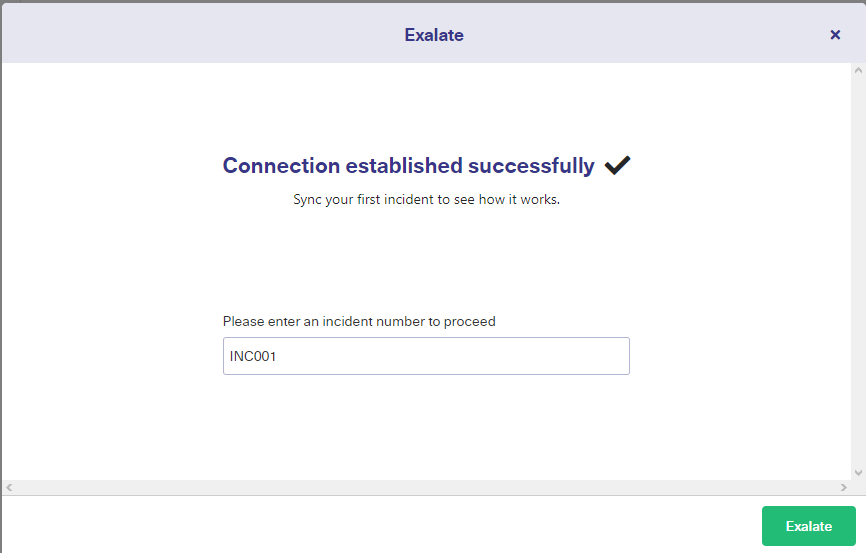
And that’s it; you’ve set up the Basic Mode connection.
Now, let’s advance to the Script Mode connection from the Jira side.
Note: You can also watch this tutorial if you prefer.
Jira ServiceNow integration: two-way scripted sync between Jira and ServiceNow
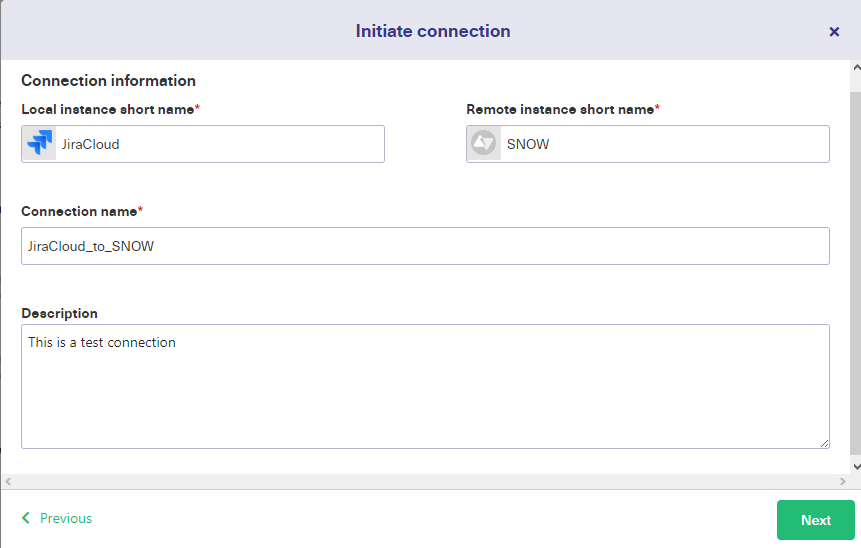
Select “Script Mode” and click “Next”.
On the next screen, enter names and descriptions for the connection and the instances. Click “Next” to continue. Choose a Jira project from the dropdown menu and click “Initiate”.

On the next screen, click “Copy invitation code” to save it to the clipboard.
Go over to the ServiceNow side and click “Accept invitation”.

Enter the code and click “Accept”.
You will see a screen showing you that the invitation has been accepted.
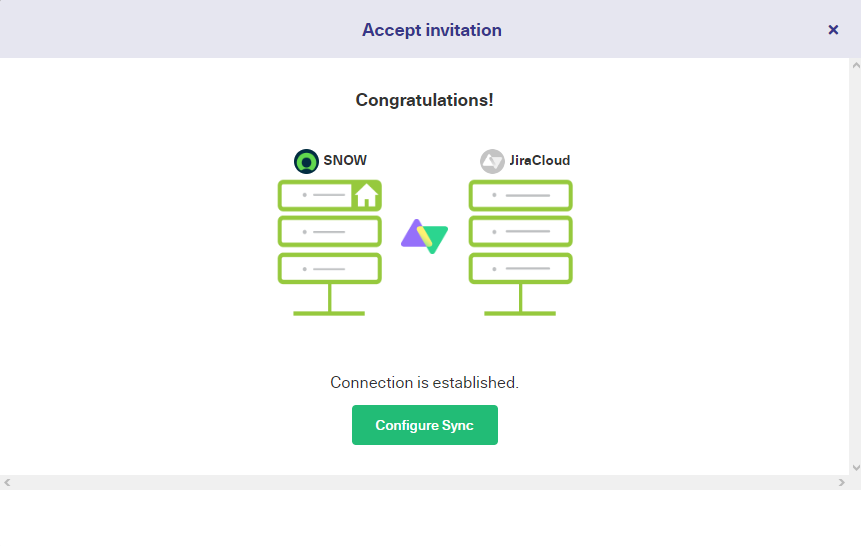
Voila! You’ve set up the Script Mode connection. The next step is to start configuring the sync for specific integration scenarios.
Step 4 - Configure Your Connection
Go to the Connections page and click the edit icon on your connection.

Go to the Rules tab, and you’ll see a list of incoming and outgoing sync rules.
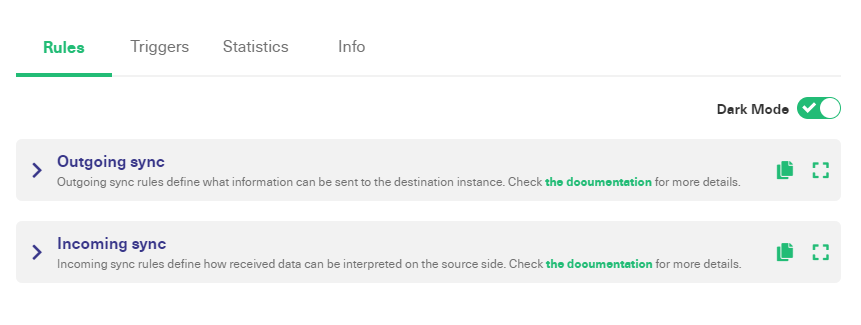
Click on the collapsable text field to view the script. You can also toggle the Light/Dark mode switch to choose your preferred theme.
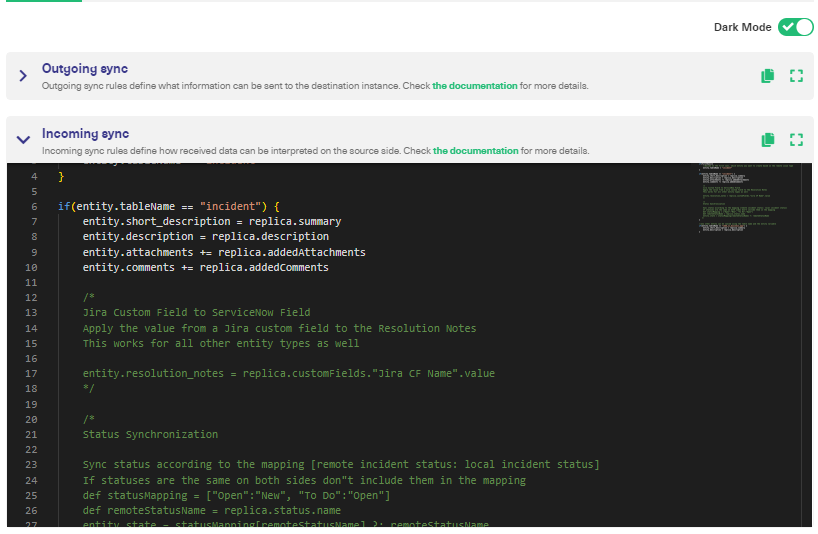
These rules define how the mapping works on both sides. You can start writing your own rules using the Groovy language.
Step 5 - Create Automated Synchronization Triggers
Triggers can automate syncs using custom rules to control how the connection works.
While on the “Edit Connection” screen, click the “Triggers” tab. Then click on “+ Create Trigger” button on the top right corner.

On the next screen, choose the entity type that this trigger will apply to. Then enter the rules for the trigger using Jira Query Language (JQL) or ServiceNow search syntax.

Click “Save” to complete the process and head back to the Trigger screen. You can add multiple triggers to one connection and use the Bulk Exalate option to sync entities with the same syntax.
Step 6 - Start Task Synchronization
Now your connection is ready to start exchanging data between ServiceNow and Jira Cloud. Once a ServiceNow incident fulfills the conditions in the triggers, it will sync with the corresponding Jira entity.
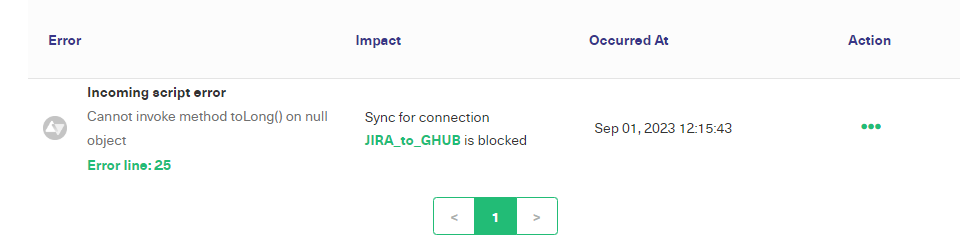
If an error is preventing your sync from working properly, you can go to the troubleshooting panel by clicking the “Error” option on the left sidebar.
Is it Possible to Sync Multiple Instances at Once?
With Exalate, you can sync multiple entities simultaneously using the same connection. You just need to ensure the sync rules perform the same operation.
Apart from that, you can connect multiple Jira or ServiceNow instances to share information bi-directionally. This feature makes Exalate a handy tool for teams working on different management platforms.
Conclusion
Adopting the right integration solution simplifies the process of connecting teams that are working on different platforms. This tool allows both sides to control their connections independently without leaving their own environment.
When implementing a Jira ServiceNow integration, a customizable solution like Exalate can do all the heavy lifting for you, without you worrying about data security or downtimes.
To find out more about how Exalate works for your specific use case, book a demo with an integration engineer.

About the author
This article was written by James Konik from Exalate - leading cross-company integration solution for Jira and ServiceNow integration and much more