If you manage one or more Microsoft Exchange Servers for your organization and are using (or are considering using) CB Exchange Server Sync for your synchronization needs, it is time to unlock its full potential through its post-processing options.
This is what we will cover in this article:
What is CB Exchange Server Sync?
CB Exchange Server Sync is a third-party solution for Microsoft Exchange Server that was originally designed to facilitate the synchronization of emails, calendars, contacts, tasks, and notes across multiple Microsoft Exchange and Office 365 mailboxes, but you can now also include Gmail/Google Workspace accounts in the sync.
CB Exchange Server Sync supports complex setups, including synchronization between different Exchange versions or usage in demanding environments like GCC-High. By leveraging CB Exchange Server Sync, organizations can synchronize Exchange Server accounts to ensure necessary data flows, improve collaboration, and enhance productivity.
Why Use Post-Processing in CB Exchange Server Sync?
Post-processing options in CB Exchange Server Sync provide additional customization and control over how synchronized items are handled and displayed in the target mailbox. Post-processing can be used to enforce compliance with organizational policies and industry regulations. It can ensure that sensitive information is handled appropriately and that data is presented in a way that optimizes clarity and identification.
What Can I Do with Post-Processing?
Post-processing allows you to modify some of the settings of the items automatically after synchronization, namely:
- Remove a reminder of the synchronized item
- Add a prefix or suffix to the synchronized item
- Add a category to the synchronized item
- Change the status (busy/free)
- Mark the event as private
- Make a totally empty replica that acts only as a placeholder
Requirements for Post-Processing
Post-processing options can only be applied to sync pairs that are simultaneously:
- One direction (from the original to the replica)
- Exchange-Exchange
Creating a New Post-Processing Template
To effectively utilize the post-processing features, you start by creating a new Post Processing Settings template:
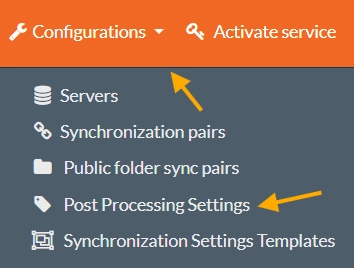
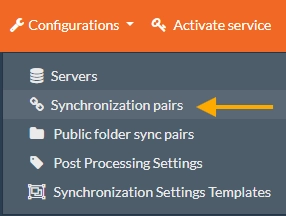
- Navigate to Configuration - Post Processing Settings.
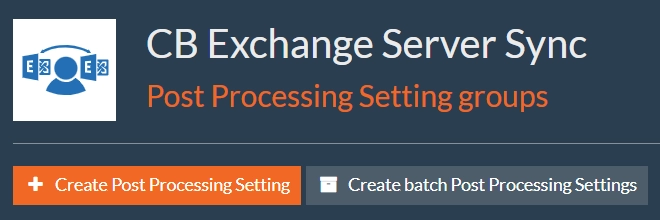
- Click the Create Post Processing Setting button. This will create a new template for post-processing. We’ll explore the batch creation of Post Processing Settings on a separate section.
- On the configuration page, you will encounter various settings for calendar, task, email, and contact items.
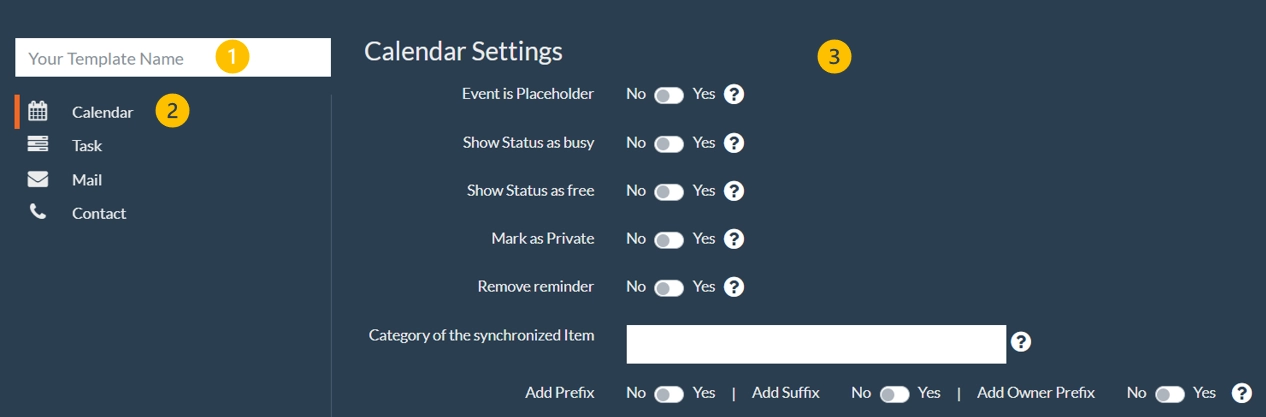
- Template Name (1): Required field to name your post-processing setting.
- Item Type (2): By selecting different item types, such as calendar or contact, you can choose settings for them.
- Item Settings (3): Not all settings are available for all item types
- Event as Placeholder (Calendar only): Creates an event to occupy time as a placeholder but does not include any details of the original event other than the start and end time. If this is set, all other settings will be ignored. This setting doesn't work with events created by invitation.
- Show Status as Busy/Free (Calendar only): Define the replica's status as either Busy or Free (independently of the original status).
- Mark as Private (Calendar only): Mark the replica as private.
- Remove Reminder (Calendar and Tasks only): If set to 'yes', reminders will be removed from the replica. This setting might not work with appointments in Office365 mailboxes.
- Category (all item types, might not work with Contacts in Office365 mailboxes): Specifies the category the item should have post-synchronization. If the category does not exist yet, it will be created.
- Add Prefix/Add Suffix/Add Owner Prefix (Emails, Calendar, and Tasks only): Adds a prefix or suffix to the item's title post-synchronization. In the case of the owner prefix, the first name of the owner is automatically added. For other prefixes and suffixes, you can choose what to add. You can only use one of these options at a time.
To add post-processing to a synchronization pair:
- Go to Configurations - Synchronization pairs
- Stop the sync pair you wish to modify.
- Once the status is Stopped, click the post processing Add button for the pair. In case you see more than one Add button, it is important to click the one with the correct icon.

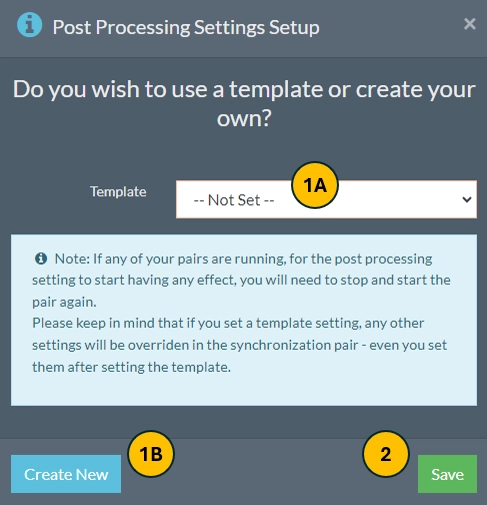
- Choose the template you created before (1A) or create a new one now (1B), then apply it to the selected sync pair by clicking Save (2).
How Can I Do This Faster?
To do all this faster, you can use the batch creation feature, which allows for the simultaneous creation of several post-processing entries. To utilize this feature, select the Create batch Post Processing Settings button located on the Post Processing page.
This powerful tool lets you create multiple post-processing groups in a single session, saving you time and effort. You place the settings in a CSV (Comma Separated Values) file, and the system will take care of the rest.
Each line in the CSV file represents a single post-processing template. The easiest way to create such a CSV is to use Microsoft Excel, Google Sheets, or a similar tool. Place the names of the columns on the first line (the order will be ignored when importing, but check if you have the right fields in the correct order). Then, create one line for each template you want.
Structure:
Name, CalendarEventIsPlaceholder, CalendarMarkAsPrivate, CalendarShowStatusAsBusy, CalendarShowStatusAsFree, CalendarCategory, CalendarPrefix, CalendarSuffix, CalendarRemoveReminder, ContactCategory, MailCategory, MailPrefix,MailSuffix, MailRemoveReminder, TaskCategory, TaskPrefix, TaskSuffix, TaskRemoveReminder
Here's a breakdown of the structure:
- Name: Give your post-processing template a clear and descriptive name for easy identification.
- Properties: These columns define how you want to edit various data types: Calendar events, Contacts, Emails, and Tasks.
- Use true or false for Boolean properties (e.g., CalendarMarkAsPrivate).
- Text properties like prefixes and suffixes can be directly entered (e.g., [Before]).
- If you try to set both a Prefix and a Suffix, only the Prefix will be set.
Order matters!
The order of columns in your CSV file is super important. Make sure they line up exactly in the order shown in the structure we outlined above.
Want to skip a property? Just leave it blank
Don't need to edit a specific property for a particular group? No problem! Just leave it empty in your CSV file. The system will then ignore that property for that group.
Example:
Testing Batch, false, false, false, false, , [Before], , false, , , , [MailA], false, , , [TaskA], true
Another Batch, true, , , , , , , , Blue, Red, , , true, Red, , , true
Let's dissect the provided example:
- The first line defines a template named "Testing Batch" that adds a [Before] prefix to events, and suffixes to Mail entries and Task entries. It also removes reminders from tasks.
- The second line creates a template called "Another Batch" that makes all Calendar events placeholders, assigns a blue category to Contacts and a Red category to Emails and Tasks, and removes reminders from to Emails and Tasks.
Remember:
- The order of values in the CSV file is crucial! Make sure they match the structure specified.
- Leaving a column blank tells the system to skip modifying that specific property.
Once the CSV is ready, here's how to batch-create post-processing groups:
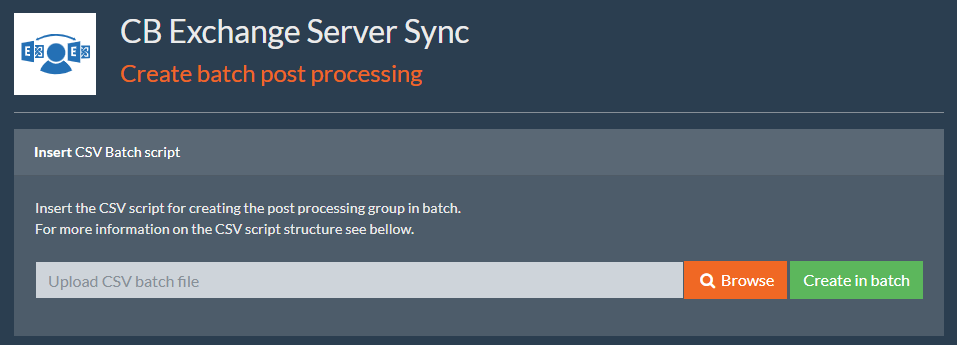
- Click Browse to select your CSV file.
- Once you've chosen the file, click Create in batch to set the process in motion.
- Sit back, relax, and let the system work its magic. Once processing is complete, you'll see a message indicating the number of post-processing groups/templates that were successfully created.

With batch creation and your trusty CSV file, you can automate repetitive post-processing tasks and get everything done in record time!
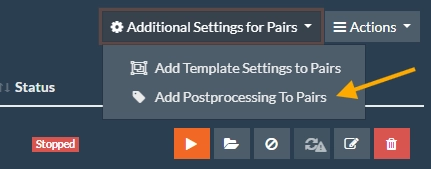
Keep in mind that you will only see this in action when you add the post-processing templates to synchronization pairs. A final pro tip is that you can add the same template to multiple sync pairs by going to Configurations -> Synchronization pairs, selecting the (stopped) pairs using the checkboxes to the left, and then choosing Additional Settings for Pairs -> Add Postprocessing To Pairs.
Post Processing Examples
- Appointment as a Placeholder: Sets appointments to show as busy without revealing details.

- Appointments Show as Free: Regardless of their original status, appointments post-sync will show as free time. This is useful when the user needs to be aware of appointments but is not taking part in them.
- Remove Reminders and Add Category to Tasks: This option tailors task synchronization to omit reminders and classify tasks under a specific category.
- Category for Synchronized Contacts: Although not supported in Office 365, allows for the classification of synced contacts in Exchange environments.
- Prefix for Synchronized Emails: Adds a designated prefix to emails to distinguish their origin post-synchronization. Alternatively, you can use a suffix (but not both).
Post Processing Limitations
It's crucial to be aware of the limitations when utilizing CB Exchange Server Sync post-processing features. These include the exclusivity to one-direction sync pairs, incompatibilities with specific settings like 'Event as Placeholder' for invitations, and the absence of certain features in Office 365, such as categories for contacts.
Wrap Up
Now, you know how to navigate the wide range of CB Exchange Server Sync's post-processing features. These features let you:
- Tweak replica items: Change item status and visibility or add tags for better organization.
- Enforce compliance: Adhere to privacy regulations and company policies using features like adding prefixes to identify emails.
- Safeguard sensitive information: Ensure privacy and confidentiality by controlling how data is handled.
- Streamline workflows: Apply settings in bulk or individually for different sync jobs, saving time and maintaining consistency.
Overall, these post-processing tools give you more control over your data, keeping it secure, organized, and easier to manage. This not only simplifies administration but also helps your organization follow best practices and regulations.

About the Author

By Ana Neto, technical advisor at Connecting Software.
“I have been a software engineer since 1997, with a more recent love for writing and public speaking. Do you have any questions or comments about this article or about CB Exchgange Server Sync? I would love to have your feedback!"